Monday, September 14, 2015

DIY: Computer Wrist Cushions

Hello computer users! Since I know you all are on some device right now. While computers are a great aid to society, many hand and wrist problems have begun to develop in users. My fiance is on his second year seeking a bachelors in computer science and often complains of his wrists getting tired. He asked me a few months ago to create him "some small pillows" to rest his wrists on while using the computer, and voila - computer wrist cushions!

Items Needed:
Sewing Machine & items associated (thread etc)
1/2 yard of fabric of your choice
Pillow stuffing
Thick ribbon (2, 3-6 inches pieces)
Two buttons

Directions:
1) Out of the fabric youve chosen cut four rectangles that are 4x8 inches (This sizing is for a medium  wrists, if you have small or large wrists please measure and make the necessary adjustment for optimal comfort. This can be done by increasing or decreasing an inch)
2) On the front of two of your rectangles, about 2 cms from the end sew your ribbon (folded, as to make a loop) to the end
3) Take two rectangles (one with the ribbon and one without) and place together so the two front sides face each other
4) Using a sewing machine, sew together three sides of the rectangle. On the last side only go halfway with your sewing
5) Turn cushion inside out through the small space you left
6) Fill cushion with pillow fluff (making it a little extra puffy is alright since the fluff will flatten some from the weight of the wrist)
7) Sew together the opening you had left
8) Repeat Steps 3-7 on the other two rectangle pieces
9) Lastly, on the opposite side of where the ribbon was sewn, the same distance from the end (about 2cms) sew a button onto each cushion

Congratulations! Now you have soft wrist cushions to finish that exam paper or write that long report you need to send you your boss! Feel comfort, use wrist cushions


Friday, April 17, 2015

DIY: How to Hem Pants

Recently my fiance was given a pair of barely worn Seven jeans from his older brother because he had outgrown them. While the waist was fine, the length was a little too long. Therefore the only solution was to hem them! Hemming a pair of pants is actually quite easy, here is how -

Necessary Items:
The pants
Scissors
Pins or safety pins
A highlighter or washable maker
A sewing machine (& necessary items associated with it)
An iron
Measuring tape

Instructions:
Step 1) Put pants on and measure how much length you want to take off (You should measure this with shoes on, or you may cut it too short) Pin and remove pants

Step 2) Turn pants inside out. Without removing pins, mark one inch from desired length using marker

Step 3) Cut along where you marked and roll pants up to where there is a fold at your desired length

Step 4) Use the iron to make the fold crisper (this makes it easier for sewing and an overall better look to the hem)
Step 5) Sew (If you a hemming jeans the seam is a bit hard to sew over, just take it slow)
Step 6) Try on pants and see how you like it!
I really enjoy the length that these came out. Without shoes there is barely a centimeter before it hits the floor and with shoes its the perfect length. Better than needing to roll up your pants!

Thursday, April 16, 2015

"Green to Go" Spicy Mint Chutney

I know Ive been away for awhile, I recently moved and Ive been bouncing between school and work. But forgetting excuses, Spring is here! What better way to feel green and fresh than with spicy mint chutney! A hot vegetarian dish!


Ingredients:
1 habanero pepper for hot (1 green chile for mild chutney)
1 bushel of cilatro
7-8 stalks of mint
3-4 tablespoons of plain yogurt
A blender
A bowl

Instructions:
1) Prepare all ingredients in blender
2) Blend
3) Enjoy with bread, naans, or crackers

My fiance loves this chutney with naans when we eat curry, but its also great for an outdoor picnic or party on a hot day! Good luck!

Wednesday, June 18, 2014

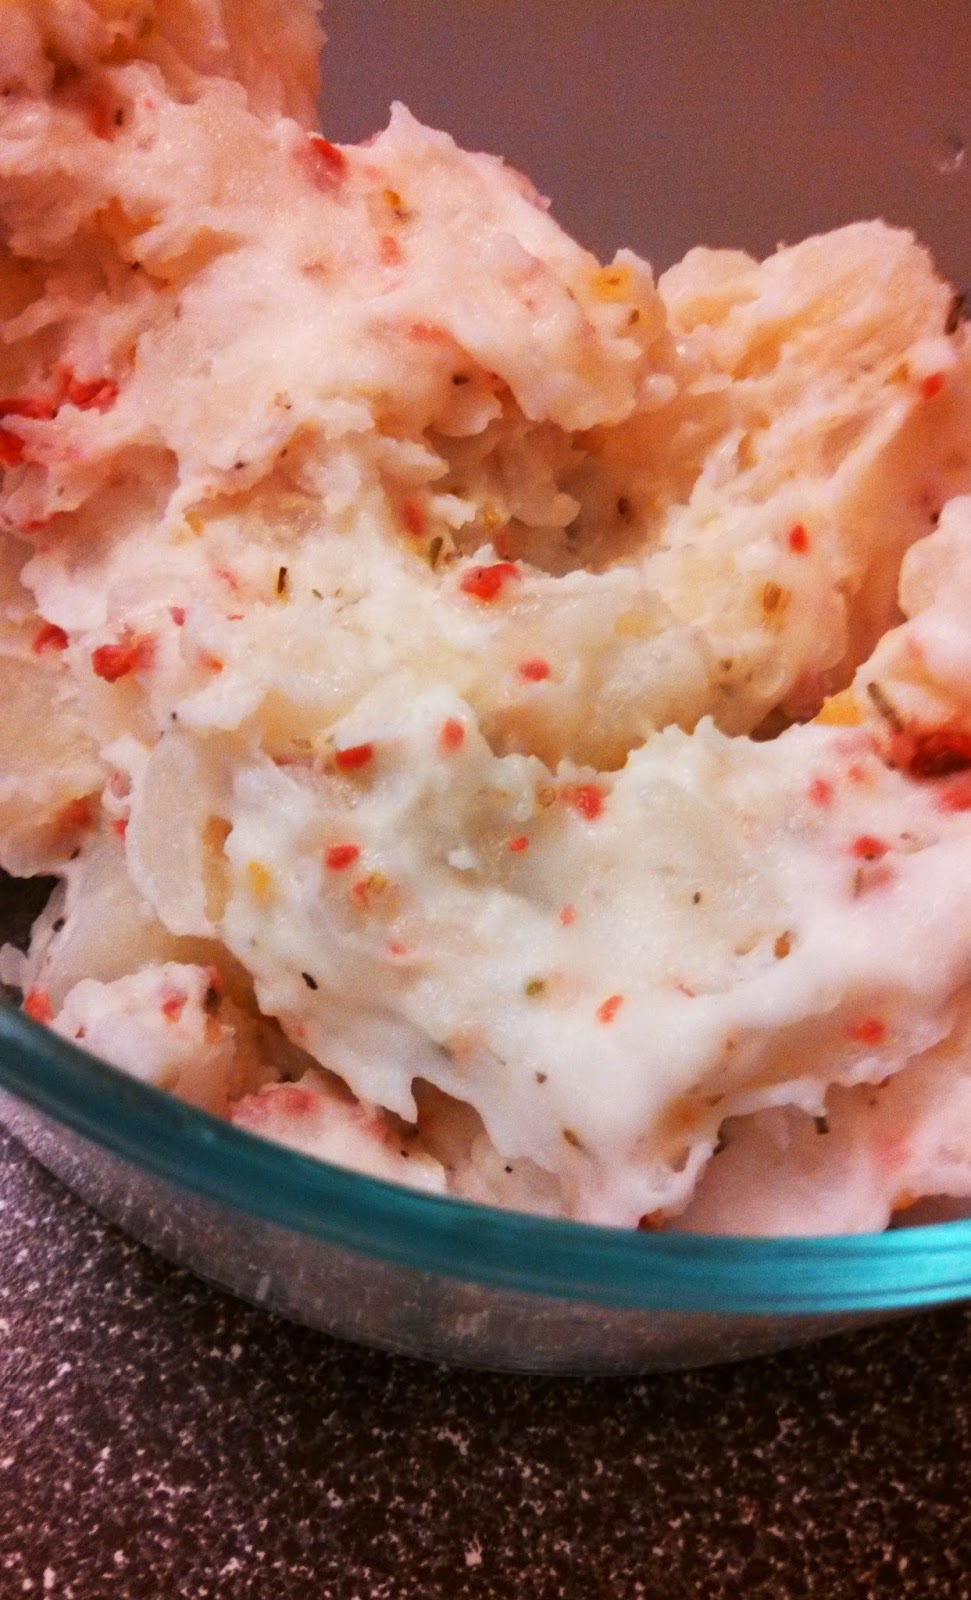
Homemade Creamy Potato Salad

Its June! Which means picnics on the beach, bonfires, and late night parties. What better way to be prepared then with delicious potato salad!
Homemade Creamy Potato Salad


Ingredients:
(This is enough for 4 people)
6 medium sized golden potatoes
2 tablespoons bacon bits
1 tablespoon oregano
6-7 tablespoons mayonnaise
1/4 cup of shredded cheese
A pot
Water
Potato masher or whisk

Directions:
1. Peel potatoes, cut up into 1" by 1" squares and let boil for an hour, strain
2. Once the potatoes are slightly cooled, but still warm, mash them until creamy
3. Once the potatoes are creamy, add mayo, oregano, bacon, and cheese
4. Mix until cheese is melted

Congratulations! Now you have delicious potato salad to enjoy with your friends this summer, or to just eat at work!


Thursday, April 3, 2014

Strawberry Pineapple Water

March was a heavy month for toxins - Mardi Gras, Oscar Night parties, St. Patrick's Day, and daylights savings time have all thrown me out-of-whack. So for April here are a few wellness activities to do everyday to keep your body in proper order. Plus a delicious recipe for Strawberry Pineapple Water!

Strawberry Pineapple Water


Ingredients:
Two Strawberries
1/2 cup cubed or sliced Pineapple
2-3 sprigs of Rosemary
Water
Ice
A glass/cup
A fork
A knife
A cutting board

Directions:
1. In a glass add pineapple and rosemary (in the image above I have mashed pineapple, which I found was very annoying to drink - therefore I recommend keeping the pineapple in chunks. I found the same problem happened with diced rosemary therefore I would recommend using fresh rosemary sprigs as well)
2. On a cutting board slice the strawberries in half
3. Add strawberries, ice, and water. (Add ice on top of fruit, this will keep it at the bottom so it doesn't get in your way when drinking)

(Optional: To add a boost of detoxifying power try adding 1 tbsp of Apple Cider Vinegar to the mix!)

Saturday, March 8, 2014

DIY: Chocolate Covered Fruit

I love chocolate covered fruit as a dessert, its refreshing and satisfying after a meal or a long day! Chocolate covered fruit is pretty easy to make, but for those of you that don't know - lets get started!

DIY: Chocolate Covered Fruit


(Note: This recipe will feed 4)
Ingredients:
1 package of quick melt chocolate (I use Wilton's Candy Melts)
2 cups of fruit of your choice (I use strawberries and blueberries)
1 small pot 
1 spatula
1-2 corn holders or a long sturdy needle
Non-stick cooking spray
Tin foil or wax sheet (if using wax sheet you will not need non-stick cooking spray)

(Note: I am using a pot to melt the chocolate on the oven, if you prefer you can use a microwavable safe bowl and slowly, stirring occasionally, melt the chocolate in the microwave)

Directions:
1. Prepare tin foil large enough to hold the fruit you have bought, spray with non-stick cooking spray
2. Empty half the bag of candy melts into the pot, stir gently on LOW heat 


3. Once most of the candy is melted, add the second half of the bag, stir gently
4. Once all the candy is melted (the mixture is a smooth consistency) remove from heat and begin to dip fruit in the melted candy mixture. (For strawberries I dipped them in the candy while holding the stem, for blueberries I stabbed with a corn holder and rubbed the fruit in the candy until well coated) 


5. Place all candy coated fruit in the freezer for about seven minutes to quickly eat or set in refrigerator until needed

Your chocolate covered fruit is complete! A quick and delicious dessert that is sure to delight all, good luck!

Wednesday, March 5, 2014

Softening Chai Body Scrub

Here in the Pacific Northwest of the United States the winter seems to be draining on. So to revitalize my skin before Summer arrives I felt it was time for a body scrub; and what better to make a body scrub with than chai?

DIY: Softening Chai Body Scrub


Ingredients:
1 cup brown sugar
2 tbsp extra virgin olive oil (or oil of your choice)
1/2 tsp cinnamon
3 chai tea bags
A container
Measuring cups
Measuring spoons


Directions:
1. In your container add one cup of brown sugar


2. Cut open three chai tea bags and empty the contents into the container
3. Add cinnamon

4. Gently, using your hand, mix the dry ingredients together
5. Add 2 tbsp of oil and gently mix thoroughly until oil is distributed evenly 


Your Softening Chai Body Scrub is now done! Before use wet down your skin. Make sure to rub in gently (especially if you are using this scrub on your face) or the mixture will scratch the skin. After using the scrub rub any excess material off with a loofah or a washcloth.  

Also, the mixture stores for several months so its perfect for a gift!