Showing posts with label crochet. Show all posts

Wednesday, January 15, 2014

Crochet Shell Border

Often, there is an ending on a piece of work (scarf, hat, etc) that your doing that needs more flair to its edges. Therefore your piece of work would do with a border. One of my favorite borders to use, is the Shell border because of the rounded look it gives to a piece.

Crochet Shell Border

(The image above is a shell border on a crochet hat made out of white cotton yarn with a J size hook)

This border is very simple, in each crochet space single or double crochet (depending the size of the item you are crocheting) three to five times (once again, depending on the size of the item you are crocheting). Proceed to the next crochet space and continue until the row is complete.

Voila! A perfect way to finish the tops of socks, the ends of scarves, and the cuffs on mittens!

Sunday, December 29, 2013

Simple Winter Crochet Scarf Pattern

As winter is in full blast on the Northern hemisphere it is time to bundle up! And what better way then to make a scarf for your self or loved one. I love this pattern because its easy to do and fairly quick depending on the yarn you use!

Simple Winter Crochet Scarf


For this pattern you could use one kind of yarn throughout the whole scarf or you could do something like I did, which is take six balls of yarn (2 Cream, 1 Wine Red, 1 Orange Masala, 1 Forest Green, and 1 Moss Green) and have the colors alternate every two rows.


Items needed:
One "J" Crochet hook
2 balls of one base color
One ball each of 3-4 various colors
(I used Knit Picks brand 100% Peruvian wool, 231 yards (50 grams) per ball)

Scarf Pattern:
1. Chain 26
2. On every other chain you will want to sc2, ch2, sc2, repeat until row is complete
3. On the next row in the 2ch space of the previous row, sc2, ch2, sc2, repeat until row is complete (The pattern should start to look like the one shown below)


4. Repeat step 3 until scarf is desired length
5. Once scarf is desired length tie off, and your scarf is complete!

Note: If you are alternating colors, I highly recommend you alternate every two rows versus every row, itll make it easier to alternate colors and generally looks more appealing to the eyes once the scarf is finished.

Tuesday, October 15, 2013

Loving Crochet Headband

Recently Ive fallen in love with headbands. Ive always found the little stray hairs that fall into my face particularly annoying but this cute and stylish solution is simple and easy!

Loving Crochet Headband


Required Materials:
Yarn
A crochet Hook
A sewing needle
Thread
A button
(For this headband I used Loops and Threads Super Fine Sock Yarn in "Redwoods: Color #5" and a "G" (4.25mm) hook)

Directions:
1. Ch 4
2. Sc 4, continue until approx. 11 1/2 inches long depending on head size 
(Note: This is the measurement for my head size, which is rather slightly smaller than average, therefore if you have a larger head size you should increase the length by 1/2 to 1 inches)

3. Using your sewing needle and thread sew the button of your choice to one side of the headband
(Note: I found buttons with four holes in their center versus 2 holes in the center to be more stable)
4. On the other side of the headband tie on a piece of your yarn into a circle in an appropriate size that can fit over your button
5. Viola! Your new headband is complete!

Friday, October 11, 2013

The Back-Loop Stitch


THE BACK-LOOP STITCH

As the winter season approaches its time to crochet those sweaters and socks! Therefore you should know how to "back-loop stitch". The back-loop stitch is tightly woven together but, because the new stitch hinges off the previous stitch, it very stretchable. Therefore this stitch is great for cuffs on sweaters, the tops of socks, or headbands.


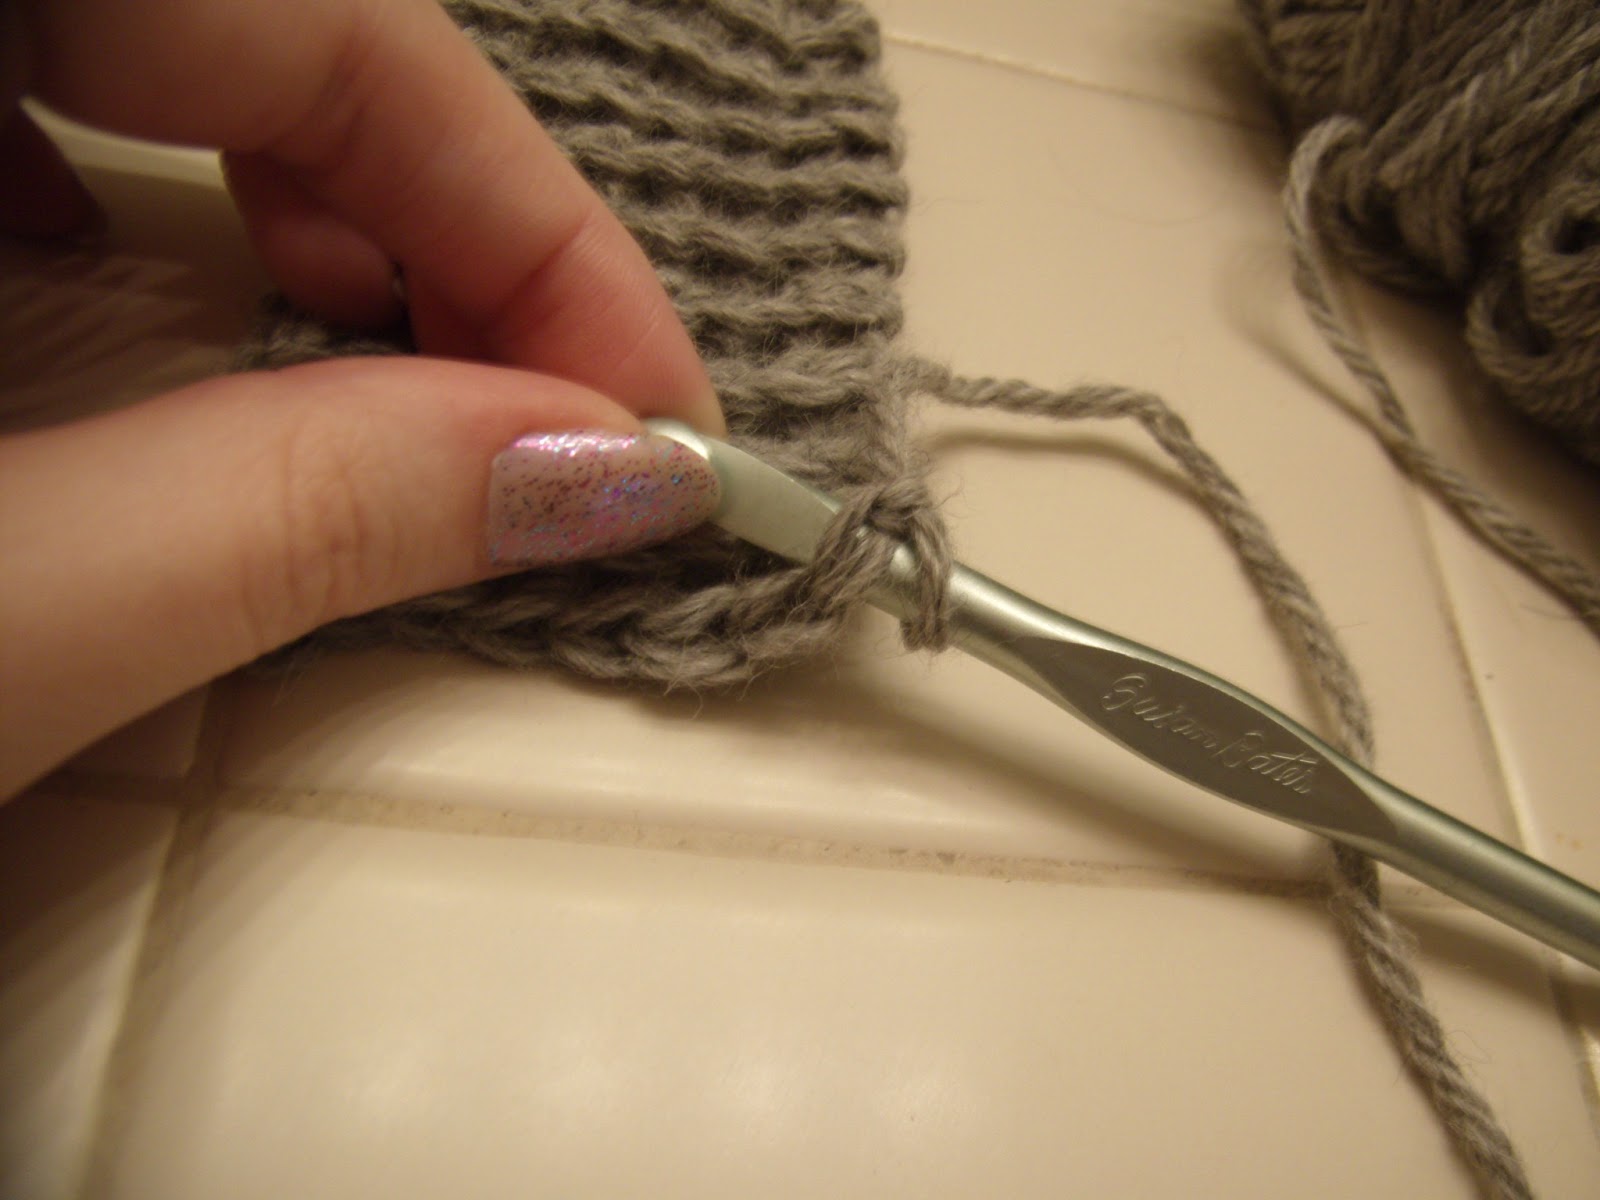
Above is an image of how to would normally do a single crochet. The image below is how you would do a back-loop stitch. The main difference between these two types of stitching is that instead of using both loops from the previous crochet, you are only using the back-loop (You can also do front-loop stitching by only using the front loops)

If you are still having difficulty with which loop is the back loop, below is another image with the back-loop being held.

Now that you know which loop is being used you can being your crochet masterpiece! The back-loop stitch is completed as a normal single crochet would be. Good luck!


Wednesday, March 27, 2013

Royal Prince Crochet Baby Crown

My boyfriends older sister is happily awaiting the arrival of her baby boy in July, therefore for her recent baby shower I decided to crochet her soon-to-be born prince a "crown" to keep him warm!


Royal Prince Baby Boy Crochet Crown

Items needed: 
1 spin of Royal Blue Yarn (Chunky 9mm)
1 spin of White or Light Cream (Chunky 9mm)
1 roll of gold string (about 1 cm in width)
1 Size N (10 mm) crochet hook


Center piece: 
1. Using the white yarn ch 5, sl st closed
2. Sc 10 in the Ch 5 circle you created, sl st closed
3. 2 Sc in each sc space, sl st to next row
4. 2 sc, sc* repeat all around, sl st closed


Your center piece should look like this, now turn your work and start using the royal blue yarn
5. With the blue yarn, ch 12
6. Back loop sc back to the white center piece, sl st into next sc of the white center piece
7. Back loop sc back out
8. Back loop sc back to white center piece, skip sc, sl st sc
9. Back loop sc back out
10. Repeat steps 8-9 until entire round is complete
Turn your work so you are crocheting on the sides of the ends of each strand from the white center piece
11. Sc in each end of each strand
12. Sc next row
13. Sc next row
14. Sl st on top of row from step 13
15. Sl st on top of row from step 12
16. Fasten off
17. Weave your gold ribbon in the strings left between the sl st's from steps 14 and 15
18. Using blue yarn ch 10, sl st closed
19. Fasten the loop into the hole of the center white piece


Congratulations! You've now created the cutest hat for your prince to be!

BONUS! Not only in this post do you learn how to make this crown but also matching mittens!

Princely Baby Mittens

Items:
Using the leftover yarn and gold from above (I had plenty to continue)

1. Using blue yarn ch 3
2. Sc 3 along ch 3
3. On other side of ch 3, sc 3
Now you can create a circle using both 3sc sides
4. Sc 6 in a circle
5. sc in each, except 2sc in each sc on sides of mittens (where the pinky and thumb would fall)
6. Sc in each sc
7. Continue until mitten is about 3 inches in length
8. Switch to white yarn, sc once around
9. Sc once around again, sl st closed
10. Fasten off
11. Weave gold ribbon in between blue and white yarn to tight the mitten over the babies hands


Congratulations! Now you have warm matching mittens for your baby boy!


Thursday, February 14, 2013

Crochet Legwarmers

To start, Happy Valentines Day! Anyway, I received this wonder baby alpaca yarn for Christmas and I've been dying to use it. Therefore because its quite chilly where here in Washington State I decided to make, the once again fashionable, legwarmers to keep from the cold! Its difficult choosing a pattern and none that I found really caught my eye. Therefore this very simple pattern is written by myself. Enjoy!

Items need:
Crochet Hook: Size J
Yarn: Knit Picks brand 100% baby alpaca yarn in "Fog Heather"*
*In this pattern I used two rounds (each round in 110 yards)


Crochet Legwarmers
Beginning Cuff-
Rnd One - Ch 7
Rnd Two - Back loop sc seven, sl st (Repeat Rnd Two for 25-30 rows depending on ankle/calf size)
Rnd Three - sl st closed

Calf -
To begin calf, turn cuff so one of the holes is facing towards you
Rnd One - In each blue space sc, over each red space ch 2, sl st to start Rnd Two


Rnd Two - 2 sc in each ch 2 space from previous Rnd, sc in each sc of previous Rnd, sl st to start next Rnd
Rnd Three - Ch 3, skip 2, sc in next three* (Repeat until entire Rnd is complete)
Rnd Four - 4 sc in each ch 3 space, ch 3* (Repeat until entire Rnd is complete)
Rnds Five - Thirty Five (Depending on calf length, you can shorten or continue Rnds)
Rnd Thirty Five - Where you would normal ch 3, ch 2 and where you would normally sc 4, sc 2 
Rnd Thirty Six - Repeat Rnd Thirty Five

Cuff Ending - 
Turn work, as to crochet alongside the calf piece


Rnd One - Ch 7 from your calf piece
Rnd Two - Back loop sc 7, this should bring you back to the main piece of work. Sl in ch 2 space* (Repeat this until you've made it around the circumphrence of the calf piece. 
Rnd Approx. 25-30 - Sl st work closed


Congratulations! You now have warm, comfortable legwarmers!


Thursday, February 7, 2013

How To Crochet

Welcome to The Dynamic Diamond DYI Blog! As this is my first post I planned to show you all how to crochet! I have plans to do more difficult patterns in later blog post, but it is best to start with how to crochet for those who don't know yet.

First you will need to know the abbreviations used in crochet patterns -
St - Stitch
Sl Sp - Slip Stitch
Ch - Chain Stitch
Sc - Single Crochet
Dc - Double Crochet
Fl - Front Loop**
Bl - Back Loop**
Yo - Yarn Over
*These are not all abbreviations used in crochet, but they are the most commonly used
**In one crochet stitch a loop that is NOT nearest you is the back loop, while the loop facing nearest to you is the front loop (All stitched shown are down using both back loops and front loops in a crochet stitch)

Items needed for this tutorial -
A crochet needle (Any Size)
Yarn (Any kind)

Single Crochet Stitch

In the photo I have a  piece of work that I have just started, I feel it is easier to see how to do a stitch on a work that is already started rather that just starting. 

First Step: Insert hook into first stitch


Second Step: Yarn over (with hand not holding the hook, place yarn over the top of the hook).
Pull through the first crochet (two loops) [First image shown]
This should create a loop on your hook (two loops should be remaining on your hook)

[Second image shown]

Third Step: Yarn over and pull through that last two loops on your hook

Congratulations! This creates your first single crochet!

Double Crochet Stitch

Step One: Start by yarning over. Insert hook into next crochet stitch.

(Image above displays yarn over, two loops from crochet stitch, first yarn over, and then original loop in that order)
Step Two: Yarn over and pull through crochet stitch (two loops)

Step Three: Yarn over and pull through last two loops

Congratulations! You've now finished your first double crochet stitch!