Wednesday, February 3, 2016

Natural Cellulite Reducing Coffee Exfoliator

I enjoy a delicious cup of coffee during work to keep me in the right mood, but I feel bad throwing the coffee grounds away knowing that it can be recycled in many other ways. My favorite way to reuse my coffee grounds is to make them into an exfoliating scrub for the body. Plus coffee is a natural cellulite reducer, causing your skin not only to be softer for the exfoliation, but tighter as well.


Ingredients/Items Needed:
1/2 cup - 1 cup used coffee grounds
1 tbsp brown sugar
A couple drops of water
Bowl
Spoon

Directions:
1) Stir coffee, sugar, and water together
2) Get in your shower and rub mixture into skin for at least five minutes
3) Shower thoroughly

Dry off and enjoy your soft skin! Great for those days that you just need to take some time for yourself.

Other ways to reuse your coffee grounds include placing it in your garden for fertilizer or keeping it in smelly places as a deodorizer.

Thursday, January 28, 2016

DIY: Refrigerator Sweet Pickled Beets

Hello everyone! At work, a few months ago, I tried sweet pickled beets for the first time and fell in love! Although I didn't want to pay the price at the store for pre-pickled beets when its MUCH cheaper to just make them yourself! Plus it feels more gratifying to eat them knowing you did all the work and the flavor tastes better since its specialized to what you like best.


Items Needed:
A pot to boil beets
A pot to make the brine
Cutting board & knife
1-2 Beets
1 Cup Vinegar
1/4 Cup sugar
1 Tbsp Cloves (ground)

Optional Items to add:
2-3 bay leaves
1-2 cloves of garlic
1/3 Cup of shallots
1 Tbsp cinnamon
Gloves (for when cutting the beet, beet juice will stain your hands)

NOTE: These measurements of ingredients are for 1-2 beets, if you are doing anymore than that please adjust the measurement accordingly

Directions:
1) Peel your beet and cut it (I cut mine into bite size bits, but you can go larger depending on the size of your jar)
2) Boil your beet until soft
3) Once beets are boiled toss them in your chosen jar until the brine is finished
4) Make the brine - combine vinegar, sugar, cloves, and other optional items that you think you would enjoy. Heat at a little lower than medium heat until the sugar is melted and the smell of vinegar is quite pungent. 
5) Pour brine over beets and seal jar
6) Let sit until cool enough to put in the refrigerator
7) Wait AT LEAST a week before enjoying your sweet pickled beets. Waiting longer does intensify the flavor. 
Note: If your using a canning jar, like the one shown above, the heat from the brine should cause the jar to seal once its been refrigerated.

Congratulations! With a little bit of a wait you can soon enjoy your sweet pickled beets! Theyre great to add to a salad or just to eat on their own! 

Monday, November 9, 2015

Five Ways to Get Ready Quicker

Like all girls, we need to wake up quite early before we need to leave so we can get ready. Since I enjoy staying in my nice warm bed for as long as possible, I've found a few ways to pack the most into a smaller amount of time. Here is a few strategies that may help you too -

1) Corkscrew Hair Pins For Buns-

I don't know how any woman lives without these magic hair holders! Whether your hair is thick or thin, one corkscrew hair pin has the hold of at least twenty bobby pins! Simply tie your hair into a bun as usual and where your hair ends, twist in the corkscrew pin. (When my hair was longer I used two corkscrew pins for a more secure hold, the second one I would screw in a few centimeters from the first pin - so if you could see through your hair the pins would look like they are making an "x").
I received my first corkscrew pin as a present from my mom, loved it, and wanted to buy more. I checked around at stores and found a good deal for some on Amazon. Stores like Target, Walgreen's, or hair care store etc. should carry them as well.

2) Take a tip from The Avengers actor "Hawkeye" and makeup artist, Jeremy Renner -

"“Brows, Lashes, Lips. Frame the face. It’s simple, it’s five minutes.”"

Focus on the major points. The best way I like to keep my brows on point, is to use a little bit of mousse so the hair lays perfectly all day. 

3) Prepare the night before - There is no easier way to be perfect looking, than to wake up looking that way. There are many different ways to style wet hair too, especially if your hair doesn't curl and stay by applying heat. Here are a few ways-

  •  The Classic Braid to Beach Waves - For this style I often divide my hair, while wet, in two down the middle and french braid down the side following along the curve of my ear until all my hair is braided. You can do this with regular braids for a more lose look. 
  • Curlers - Wearing them may make you feel like you're in the 1930's/1940's but its the best way to guarantee a perfect curl all day. While hair is wet, run some mousse through it before putting in curlers. To put in curlers section your hair into rows down, keeping your natural part where it usual is. Now take a top section of that row, place curler at bottom of hair and roll inward towards your head (Make sure you are not rolling outward or you hair will stick out when unrolled) Take another section below the section your just rolled on the same row and repeat. Repeat this along all rows until all your hair is rolled. Using long clips pin the bottom of the curlers so they stay in place while you sleep. (For a more secure hold, tie hair up Rosie the Riveter style using a handkerchief or scarf) 

       I purchased an assortment of sizes from Target for a fair price, but they can be found at any store        that would sell hair products. 

4) Utilize scraps of paper or tape. What I find takes up most of my time in the morning is fixing my eye makeup with Q-tips. To save time fixing these mistakes, I hold a small piece of paper behind my lashes when applying mascara. On the rare occasion that I do use eyeliner, I use tape to make sharper edges, running the brush along the side for extremely sharp lines. Wait for the eyeliner to fully dry before removing the tape, or it will smear. (I always recommend liquid eyeliner over pencil) Such use of paper and tape can be used as guides to fill in your eyebrows as well.

5) Put your phone on the charger in another room. This makes sure it wont be dead for the rest of your day and you didn't waste most of your morning looking at Facebook. Set an alarm so you don't forget to take it with you and you know when you need to leave.

I hope these few simple tips help you to get as much precious sleep as you can! Good morning!

Monday, September 28, 2015

Hearty Harvest Soup

Hello everyone! With the leaves changing and the weather getting colder for fall I'm getting excited for squashes, tomatoes, and apple cider. A bit of a mixture of all, Hearty Harvest Soup is a simple vegetarian meal that is sure to please the stomach.


Ingredients/Items:

1 acorn squash (Or 1 butternut squash)
2 honey crisp apples
3 tomatoes
slow cooker
blender
1 can veggie or chicken stock
1/4 of a stick of non-salted butter 
microwave

This recipe serves 3-4

Directions:

1. Cut squash in half and gut out the inside goop, then microwave for six minutes in a bowl with 5 tbsp of water with the insides facing down
Tip: Keep the seeds to roast and eat as a snack
2. Peel the squash and apples, cut into approx 1 x 1 inch cubes, add to slow cooker. Remove stem from tomato (if any), cut into four slices and add to slow cooker. Add veggie or chicken stock and butter.
3. Slow cook for approx. 3 hours or until very mushy
4. Blend until creamy and serve
Tip: Goes great with grilled cheese sandwiches!

Simple ingredients for a flavor-fully delicious meal that you'll feel happy to eat


Monday, September 14, 2015

DIY: Computer Wrist Cushions

Hello computer users! Since I know you all are on some device right now. While computers are a great aid to society, many hand and wrist problems have begun to develop in users. My fiance is on his second year seeking a bachelors in computer science and often complains of his wrists getting tired. He asked me a few months ago to create him "some small pillows" to rest his wrists on while using the computer, and voila - computer wrist cushions!

Items Needed:
Sewing Machine & items associated (thread etc)
1/2 yard of fabric of your choice
Pillow stuffing
Thick ribbon (2, 3-6 inches pieces)
Two buttons

Directions:
1) Out of the fabric youve chosen cut four rectangles that are 4x8 inches (This sizing is for a medium  wrists, if you have small or large wrists please measure and make the necessary adjustment for optimal comfort. This can be done by increasing or decreasing an inch)
2) On the front of two of your rectangles, about 2 cms from the end sew your ribbon (folded, as to make a loop) to the end
3) Take two rectangles (one with the ribbon and one without) and place together so the two front sides face each other
4) Using a sewing machine, sew together three sides of the rectangle. On the last side only go halfway with your sewing
5) Turn cushion inside out through the small space you left
6) Fill cushion with pillow fluff (making it a little extra puffy is alright since the fluff will flatten some from the weight of the wrist)
7) Sew together the opening you had left
8) Repeat Steps 3-7 on the other two rectangle pieces
9) Lastly, on the opposite side of where the ribbon was sewn, the same distance from the end (about 2cms) sew a button onto each cushion

Congratulations! Now you have soft wrist cushions to finish that exam paper or write that long report you need to send you your boss! Feel comfort, use wrist cushions


Friday, April 17, 2015

DIY: How to Hem Pants

Recently my fiance was given a pair of barely worn Seven jeans from his older brother because he had outgrown them. While the waist was fine, the length was a little too long. Therefore the only solution was to hem them! Hemming a pair of pants is actually quite easy, here is how -

Necessary Items:
The pants
Scissors
Pins or safety pins
A highlighter or washable maker
A sewing machine (& necessary items associated with it)
An iron
Measuring tape

Instructions:
Step 1) Put pants on and measure how much length you want to take off (You should measure this with shoes on, or you may cut it too short) Pin and remove pants

Step 2) Turn pants inside out. Without removing pins, mark one inch from desired length using marker

Step 3) Cut along where you marked and roll pants up to where there is a fold at your desired length

Step 4) Use the iron to make the fold crisper (this makes it easier for sewing and an overall better look to the hem)
Step 5) Sew (If you a hemming jeans the seam is a bit hard to sew over, just take it slow)
Step 6) Try on pants and see how you like it!
I really enjoy the length that these came out. Without shoes there is barely a centimeter before it hits the floor and with shoes its the perfect length. Better than needing to roll up your pants!

Thursday, April 16, 2015

"Green to Go" Spicy Mint Chutney

I know Ive been away for awhile, I recently moved and Ive been bouncing between school and work. But forgetting excuses, Spring is here! What better way to feel green and fresh than with spicy mint chutney! A hot vegetarian dish!


Ingredients:
1 habanero pepper for hot (1 green chile for mild chutney)
1 bushel of cilatro
7-8 stalks of mint
3-4 tablespoons of plain yogurt
A blender
A bowl

Instructions:
1) Prepare all ingredients in blender
2) Blend
3) Enjoy with bread, naans, or crackers

My fiance loves this chutney with naans when we eat curry, but its also great for an outdoor picnic or party on a hot day! Good luck!

Wednesday, June 18, 2014

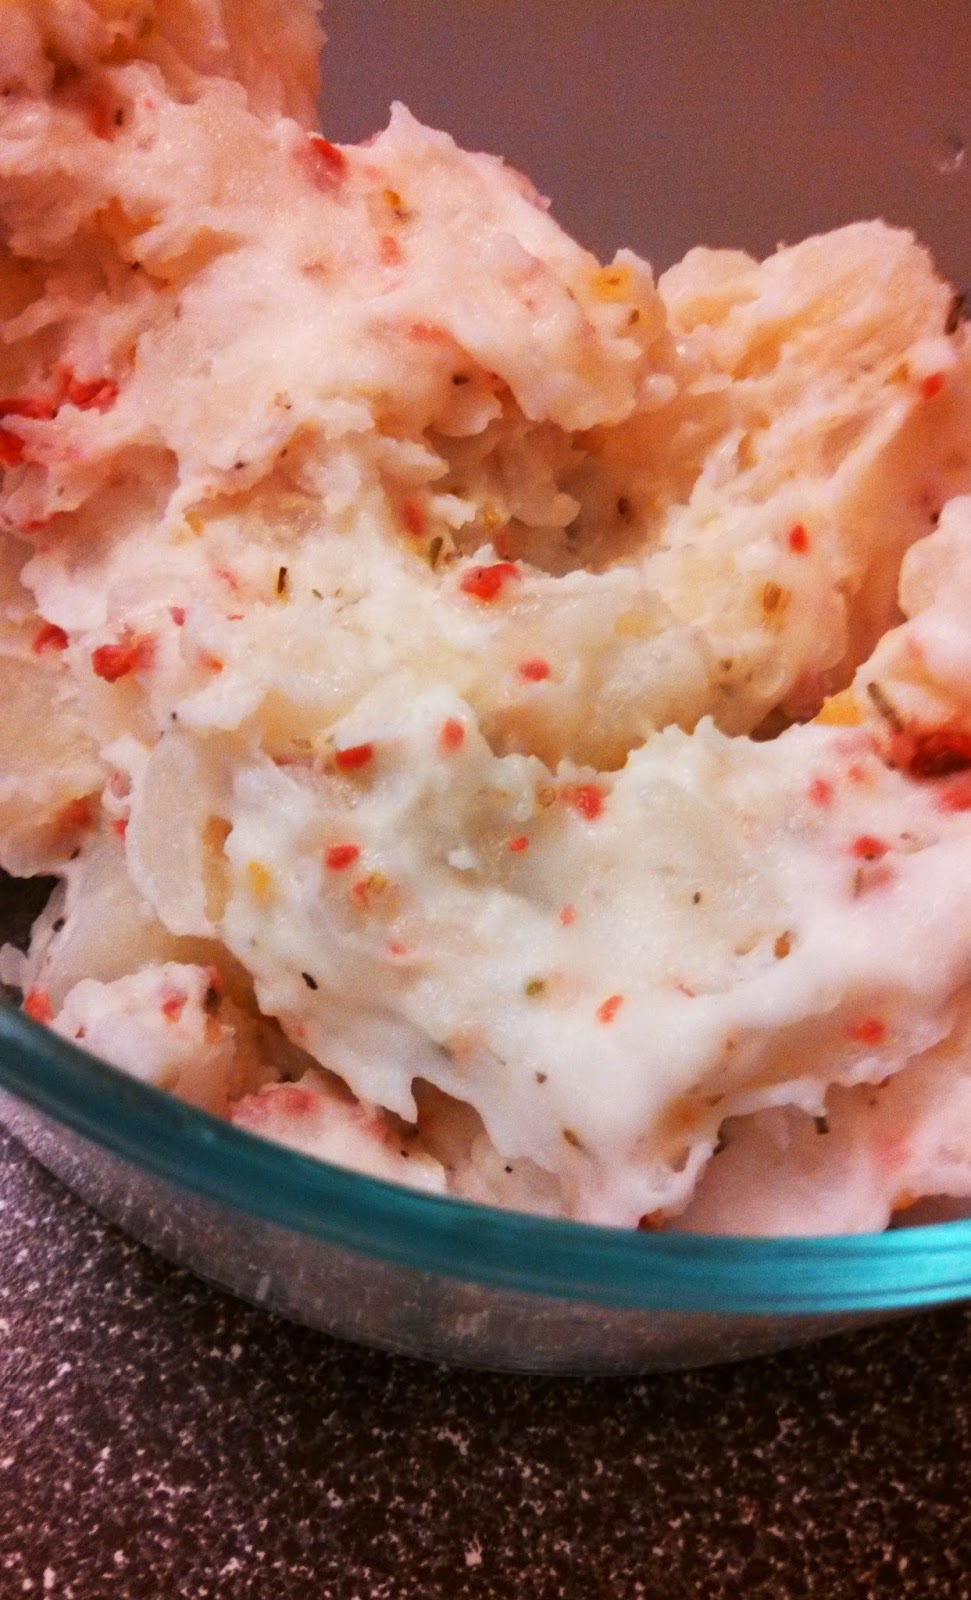
Homemade Creamy Potato Salad

Its June! Which means picnics on the beach, bonfires, and late night parties. What better way to be prepared then with delicious potato salad!
Homemade Creamy Potato Salad


Ingredients:
(This is enough for 4 people)
6 medium sized golden potatoes
2 tablespoons bacon bits
1 tablespoon oregano
6-7 tablespoons mayonnaise
1/4 cup of shredded cheese
A pot
Water
Potato masher or whisk

Directions:
1. Peel potatoes, cut up into 1" by 1" squares and let boil for an hour, strain
2. Once the potatoes are slightly cooled, but still warm, mash them until creamy
3. Once the potatoes are creamy, add mayo, oregano, bacon, and cheese
4. Mix until cheese is melted

Congratulations! Now you have delicious potato salad to enjoy with your friends this summer, or to just eat at work!


Thursday, April 3, 2014

Strawberry Pineapple Water

March was a heavy month for toxins - Mardi Gras, Oscar Night parties, St. Patrick's Day, and daylights savings time have all thrown me out-of-whack. So for April here are a few wellness activities to do everyday to keep your body in proper order. Plus a delicious recipe for Strawberry Pineapple Water!

Strawberry Pineapple Water


Ingredients:
Two Strawberries
1/2 cup cubed or sliced Pineapple
2-3 sprigs of Rosemary
Water
Ice
A glass/cup
A fork
A knife
A cutting board

Directions:
1. In a glass add pineapple and rosemary (in the image above I have mashed pineapple, which I found was very annoying to drink - therefore I recommend keeping the pineapple in chunks. I found the same problem happened with diced rosemary therefore I would recommend using fresh rosemary sprigs as well)
2. On a cutting board slice the strawberries in half
3. Add strawberries, ice, and water. (Add ice on top of fruit, this will keep it at the bottom so it doesn't get in your way when drinking)

(Optional: To add a boost of detoxifying power try adding 1 tbsp of Apple Cider Vinegar to the mix!)

Saturday, March 8, 2014

DIY: Chocolate Covered Fruit

I love chocolate covered fruit as a dessert, its refreshing and satisfying after a meal or a long day! Chocolate covered fruit is pretty easy to make, but for those of you that don't know - lets get started!

DIY: Chocolate Covered Fruit


(Note: This recipe will feed 4)
Ingredients:
1 package of quick melt chocolate (I use Wilton's Candy Melts)
2 cups of fruit of your choice (I use strawberries and blueberries)
1 small pot 
1 spatula
1-2 corn holders or a long sturdy needle
Non-stick cooking spray
Tin foil or wax sheet (if using wax sheet you will not need non-stick cooking spray)

(Note: I am using a pot to melt the chocolate on the oven, if you prefer you can use a microwavable safe bowl and slowly, stirring occasionally, melt the chocolate in the microwave)

Directions:
1. Prepare tin foil large enough to hold the fruit you have bought, spray with non-stick cooking spray
2. Empty half the bag of candy melts into the pot, stir gently on LOW heat 


3. Once most of the candy is melted, add the second half of the bag, stir gently
4. Once all the candy is melted (the mixture is a smooth consistency) remove from heat and begin to dip fruit in the melted candy mixture. (For strawberries I dipped them in the candy while holding the stem, for blueberries I stabbed with a corn holder and rubbed the fruit in the candy until well coated) 


5. Place all candy coated fruit in the freezer for about seven minutes to quickly eat or set in refrigerator until needed

Your chocolate covered fruit is complete! A quick and delicious dessert that is sure to delight all, good luck!

Wednesday, March 5, 2014

Softening Chai Body Scrub

Here in the Pacific Northwest of the United States the winter seems to be draining on. So to revitalize my skin before Summer arrives I felt it was time for a body scrub; and what better to make a body scrub with than chai?

DIY: Softening Chai Body Scrub


Ingredients:
1 cup brown sugar
2 tbsp extra virgin olive oil (or oil of your choice)
1/2 tsp cinnamon
3 chai tea bags
A container
Measuring cups
Measuring spoons


Directions:
1. In your container add one cup of brown sugar


2. Cut open three chai tea bags and empty the contents into the container
3. Add cinnamon

4. Gently, using your hand, mix the dry ingredients together
5. Add 2 tbsp of oil and gently mix thoroughly until oil is distributed evenly 


Your Softening Chai Body Scrub is now done! Before use wet down your skin. Make sure to rub in gently (especially if you are using this scrub on your face) or the mixture will scratch the skin. After using the scrub rub any excess material off with a loofah or a washcloth.  

Also, the mixture stores for several months so its perfect for a gift!

Tuesday, January 21, 2014

Revitalizing Avocado Facial Mask

With the cold winds still blustering outside, my face has been looking rather dried out lately. Therefore I decided to do an avocado facial mask to perk my skin up for Spring!

Revitalizing Avocado Facial Mask


Ingredients:
1/2 avocado
1 tbsp honey
1/2 tbsp loose leaf green tea leaves
(optional) facial moisturizer 

Instructions:
1. Mush 1/2 of an avocado in a bowl (or puree if you prefer)


2. Mix in honey and green tea


3. Mix contents and gentle apply all over face (make sure your face is clean/washed before applying facial mask)

4. Leave on for 3-5 minutes
5. Rinse face thoroughly 
6. (optional) Apply moisturizer to face

Voila a clear and rejuvenated face! Feel beautiful today!

Saturday, January 18, 2014

Tips & Tricks for the Everyday

I have all these small tips that I know of that are easy "cheats" in the morning to save time or energy, but I felt they weren't big enough to write a post about on their own. So here are a few
Tips & Tricks for the Everyday!

1. Run a dryer sheet over your hair if you are experiencing static cling (I have this often occur after blow drying or straightening my hair)

2. If your lips gloss tube is low, place the tube in a cup of hot water for a few minutes so that any spare lip gloss on the sides will melt to the bottom so that it can be used

3. Sugar is a great exfoliator in any kind of facial scrub

4. Mix some lemon juice and baking soda into your toothpaste to get a brighter smile

5.  Rub wet coffee grounds on your skin to reduce cellulite (Best to do this before a shower, so you can rinse of more easily)

6. Reuse your green tea bag, once it has cooled - place over your eyes to reduce under eye circle or bags 

7. Accidentally got blood on your clothes? Let soak in hydrogen peroxide for a few hours (or more, depending on how much blood) the blood should be gone before you put the article of clothing into the washer

8. Blonde hair? If you weren't able to wash and your hair is starting to look greasy, add some baby powder to your hair. It'll make your hair look good as new for the day

9. Shoes smell bad? Sprinkle some baby powder in them and leave overnight. May have to repeat for several nights depending on the smelliness of the shoe

10. Wearing flats but no socks? Sprinkle baby powder in your shoes before wearing them. The baby powder will help prevent the sweat from your feet from getting all over your shoes

11. Dyeing your hair? Rub Vaseline over areas of your face (and neck) where you do not want the hair dye to get onto. The Vaseline will act as a barrier and will wash of when you rinse your hair

12. Dead lighter? Use a small of amount of rubbing alcohol (or nail polish remover) onto a small stick and use the dead lighter to create a spark to make a flame

13. Bee sting? Make a paste using baking powder and water. Apply to wound and cover with band aid

14. As a substitute for shaving cream, use baby oil or conditioner

15.  If you must dry shave, then apply lotion first so the area you are shaving does not dry out

16. If you want to naturally lighten/highlight your hair, apply lemon juice to your hair and sit out in the sunshine for a few hours

17. Apply a light amount of Elmer's glue with a Q-Tip around your nails when painting them for any clumsy mistakes. Once the nail polish on the nail is dry, peel of the Elmer's glue from the skin for perfect nails

18. If you receive flowers cut of a small portion off the bottom of the stem every other day so that the flowers live longer (flowers receive more water) 

19. To make temporary false lashes, in-between coats of mascara apply small amounts of baby powder with a Q-Tip. Continue this routine until lashes are a sufficient length

20. An easy way to set your makeup for an evening out (so running will not occur) is to spray your face with a very light dusting of hair spray

21. If you have a small hole in lace or a pair of pantyhose, use superglue to seal the threads so the rip will not continue

Hope these tips help you through your day! You can do it!

Wednesday, January 15, 2014

Crochet Shell Border

Often, there is an ending on a piece of work (scarf, hat, etc) that your doing that needs more flair to its edges. Therefore your piece of work would do with a border. One of my favorite borders to use, is the Shell border because of the rounded look it gives to a piece.

Crochet Shell Border

(The image above is a shell border on a crochet hat made out of white cotton yarn with a J size hook)

This border is very simple, in each crochet space single or double crochet (depending the size of the item you are crocheting) three to five times (once again, depending on the size of the item you are crocheting). Proceed to the next crochet space and continue until the row is complete.

Voila! A perfect way to finish the tops of socks, the ends of scarves, and the cuffs on mittens!

Sunday, December 29, 2013

Simple Winter Crochet Scarf Pattern

As winter is in full blast on the Northern hemisphere it is time to bundle up! And what better way then to make a scarf for your self or loved one. I love this pattern because its easy to do and fairly quick depending on the yarn you use!

Simple Winter Crochet Scarf


For this pattern you could use one kind of yarn throughout the whole scarf or you could do something like I did, which is take six balls of yarn (2 Cream, 1 Wine Red, 1 Orange Masala, 1 Forest Green, and 1 Moss Green) and have the colors alternate every two rows.


Items needed:
One "J" Crochet hook
2 balls of one base color
One ball each of 3-4 various colors
(I used Knit Picks brand 100% Peruvian wool, 231 yards (50 grams) per ball)

Scarf Pattern:
1. Chain 26
2. On every other chain you will want to sc2, ch2, sc2, repeat until row is complete
3. On the next row in the 2ch space of the previous row, sc2, ch2, sc2, repeat until row is complete (The pattern should start to look like the one shown below)


4. Repeat step 3 until scarf is desired length
5. Once scarf is desired length tie off, and your scarf is complete!

Note: If you are alternating colors, I highly recommend you alternate every two rows versus every row, itll make it easier to alternate colors and generally looks more appealing to the eyes once the scarf is finished.

Tuesday, November 12, 2013

Holiday Jellied Sandwich Cookies

November has arrived and therefore the holidays are approaching! Time to get in some warm pajamas and curl up with some cookies and a good book. This simple recipe is delicious for the occasion!

Holiday Jellied Sandwich Cookies


Ingredients:
1 stick of unsalted butter
2 cup sugar
4 tbsp lemon zest (optional)
2 egg
1/2 tsp salt
3 cup flour
1/2 cup jam

Other items needed:
A mixer
A cookie sheet
A bowl
A spatula
A knife
Cling wrap
Tin foil
Measuring cups and spoons
Refrigerator
Circular cookie cutter (if you want perfectly round cookies)

Directions:
1. Beat butter, sugar, zest, eggs and salt into a bowl using your mixer
2. Slowly beat in flour
3. Roll dough into two round cylinders about the same size each


4. Cover the dough with cling wrap and leave in the refrigerator for at least an hour, overnight would be best


5. Preheat oven to 375 F, take dough out of the fridge and cut into 1/4 inch thick disks. (Note: I remolded some of my cookies edges so that they were fairly more round, a cookie cutter can fix any misshapen cookies if you want them to be perfectly round)
(Note: If you happen to have a small cookie cutter, you can cut the center out of some cookies so that the jam can show through on the finished assembled cookie)


6. Bake 7-10 minutes
7. Let cool
8. Add jam to the bottom of one cookie and stick together with the bottom of another cookie (so that both tops of cookies are on each outer side of the cookie)


Congratulations! You have now made delicious cookies to indulge yourself or impress your family with! Happy Holidays!

Saturday, October 26, 2013

Sweet Pomegranate Guacamole

As the holdiays approach everyone needs a new recipe to impress their guests. This dish is also a great snack food for those looking to watch their weight. A mixture of two exotic fruits, the pomegranate and avocado, for an enticing food experience

Sweet Pomegranate Guacamole


Ingredients and Items Needed:
One avocado (soft)
One pomegranate
1/3 measuring cup
1 bowl
A knife
A cutting board
A fork
A mortar and pestle (or a cup and a large spoon)
A paper towel
(Optional additions: Crushed red pepper, lemon juice)

Instructions:
1. Cut up and extract pomegranate seeds


2. Take 1/3 cups (or slightly less, depending on the size of your avocado - my avocados are quite large) of non-crushed pomegranate seeds, using mortar and pestle (or in a cup with a large spoon) mash the pomegranate seeds (Note: The pomegranate seed juice will fly everywhere when you crush the seeds so make sure to cover the cup or pestle with a paper towel while crushing the seeds)


3. On your cutting board, cut the avocado and peel off the skin. 


4. Mash the avocado in a bowl with your fork.


5. Mix the avocado and the pomegranate mush together


Delicious! If you want to spice up this dish more think of adding crushed red pepper for a sweet n' spicy taste. Another addition could be adding some lemon juice for a sweet n' sour taste.

I suggest eating this guacamole with Triscuits or Wheat Thins, I particularly like the Roasted Tomato flavor.
Good luck!

Tuesday, October 15, 2013

Loving Crochet Headband

Recently Ive fallen in love with headbands. Ive always found the little stray hairs that fall into my face particularly annoying but this cute and stylish solution is simple and easy!

Loving Crochet Headband


Required Materials:
Yarn
A crochet Hook
A sewing needle
Thread
A button
(For this headband I used Loops and Threads Super Fine Sock Yarn in "Redwoods: Color #5" and a "G" (4.25mm) hook)

Directions:
1. Ch 4
2. Sc 4, continue until approx. 11 1/2 inches long depending on head size 
(Note: This is the measurement for my head size, which is rather slightly smaller than average, therefore if you have a larger head size you should increase the length by 1/2 to 1 inches)

3. Using your sewing needle and thread sew the button of your choice to one side of the headband
(Note: I found buttons with four holes in their center versus 2 holes in the center to be more stable)
4. On the other side of the headband tie on a piece of your yarn into a circle in an appropriate size that can fit over your button
5. Viola! Your new headband is complete!

Friday, October 11, 2013

The Back-Loop Stitch


THE BACK-LOOP STITCH

As the winter season approaches its time to crochet those sweaters and socks! Therefore you should know how to "back-loop stitch". The back-loop stitch is tightly woven together but, because the new stitch hinges off the previous stitch, it very stretchable. Therefore this stitch is great for cuffs on sweaters, the tops of socks, or headbands.


Above is an image of how to would normally do a single crochet. The image below is how you would do a back-loop stitch. The main difference between these two types of stitching is that instead of using both loops from the previous crochet, you are only using the back-loop (You can also do front-loop stitching by only using the front loops)

If you are still having difficulty with which loop is the back loop, below is another image with the back-loop being held.

Now that you know which loop is being used you can being your crochet masterpiece! The back-loop stitch is completed as a normal single crochet would be. Good luck!